


Массовая обработка деталей, напечатанных на 3D-принтере: удаление заусенцев и полировка компонентов, изготовленных методом аддитивного производства.
Постобработка в аддитивном производстве • Удаление заусенцев, сглаживание и полировка • Детали, изготовленные методом FDM, SLA/DLP, SLS и аддитивного производства из металла
3D-печать позволяет получать детали, близкие к окончательной форме, но почти никогда не близкие к окончательной поверхности. Следы от поддерживающих структур, линии слоев, частично расплавленный порошок и острые края отделяют свежеотпечатанную деталь от пригодного для продажи или функционального компонента.Массовая отделка— Вибрационная, барабанная и магнитная обработка с использованием подходящих абразивных материалов — это наиболее экономичный способ устранить этот разрыв при обработке партий деталей без ручного труда над каждой деталью.

Почему это важно.Ручная шлифовка не образует окалины и плохо обрабатывает внутренние каналы. Массовая финишная обработка обрабатывает каждую деталь одинаково — включая отверстия, каналы и решетчатые структуры — и превращает постобработку из узкого места в повторяемый этап производства.
1. Почему детали, напечатанные на 3D-принтере, нуждаются в постобработке?
Каждый процесс аддитивного производства оставляет свой собственный след на поверхности: при FDM-печати видны гребни слоев и точки контакта с опорами; при печати смолой (SLA/DLP) — выступы опор и, если смола не отверждена должным образом, липкие участки; детали, изготовленные методом SLS, после извлечения из порошковой матрицы имеют зернистую, спеченную корку; металлические детали, изготовленные методом аддитивного производства, имеют шероховатую поверхность в исходном состоянии, а также следы удаления опор. Помимо косметических дефектов, эти недостатки влияют на посадку, усталостную прочность, чистоту для медицинского или пищевого применения, а также на то, насколько хорошо деталь поддается покраске, гальваническому покрытию или нанесению покрытий. Массовая обработка решает все эти проблемы механическим способом, партиями.
2. Проблемы, связанные с процессом печати.
| Процесс аддитивного производства | Типичные проблемы поверхности | Метод массовой отделки |
| FDM (PLA, PETG, ABS) | Слоистые гребни, рубцы от опор, прослойки | Вибрационная или барабанная шлифовка с использованием скорлупы грецкого ореха/кукурузных початков или мелкого пластика; щадящие циклы защищают тонкие стенки. |
| Смола SLA/DLP | Опорные выступы, хрупкие зеленые края, участки с переходом от глянцевого к матовому покрытию. | Сначала полимеризация, затем вибрационная обработка с использованием мелкодисперсного пластика; влажная шпаклевка помогает избежать сколов. |
| Нейлон SLS / MJF (PA12) | Зернистая спеченная оболочка, порошок, застрявший в отверстиях. | Вибрационная или барабанная обработка с использованием керамических или пластиковых абразивных материалов для сглаживания и герметизации поверхности; улучшает поглощение красителя. |
| Металлическая аддитивная технология (SLM/DMLS) | Шероховатая текстура, характерная для фактического состояния объекта, следы крепления опор, брызги краски. | Центробежная или вибрационная обработка с использованием керамических абразивных материалов; поэтапная обработка для удаления заусенцев, а затем для окончательной шлифовки. |
3. Выбор оборудования в зависимости от типа детали.
- Вибрационные шлифовальные станки:Это стандартный способ печати для партий мелких и средних деталей. Чаши бережно обрабатывают детали сложной геометрии; контейнеры предназначены для деталей большей длины или большего размера.
- Вращающиеся барабанные барабанные полировальные машины:Экономичное сглаживание прочных пластиковых отпечатков; сухие органические материалы используются также для сушки и придания блеска.
- Станки для магнитной обработки:Игольчатый наполнитель, приводимый в движение магнитными полями, проникает в глубокие отверстия, резьбу и сложные каналы — идеально подходит для изготовления крошечных металлических деталей, изготовленных методом аддитивного производства, или деталей из смолы со сложной внутренней структурой.
- Центробежные машины:Когда к обработке металлических деталей предъявляются высокие требования по времени цикла или характеристикам поверхности; максимальная интенсивность на единицу площади.
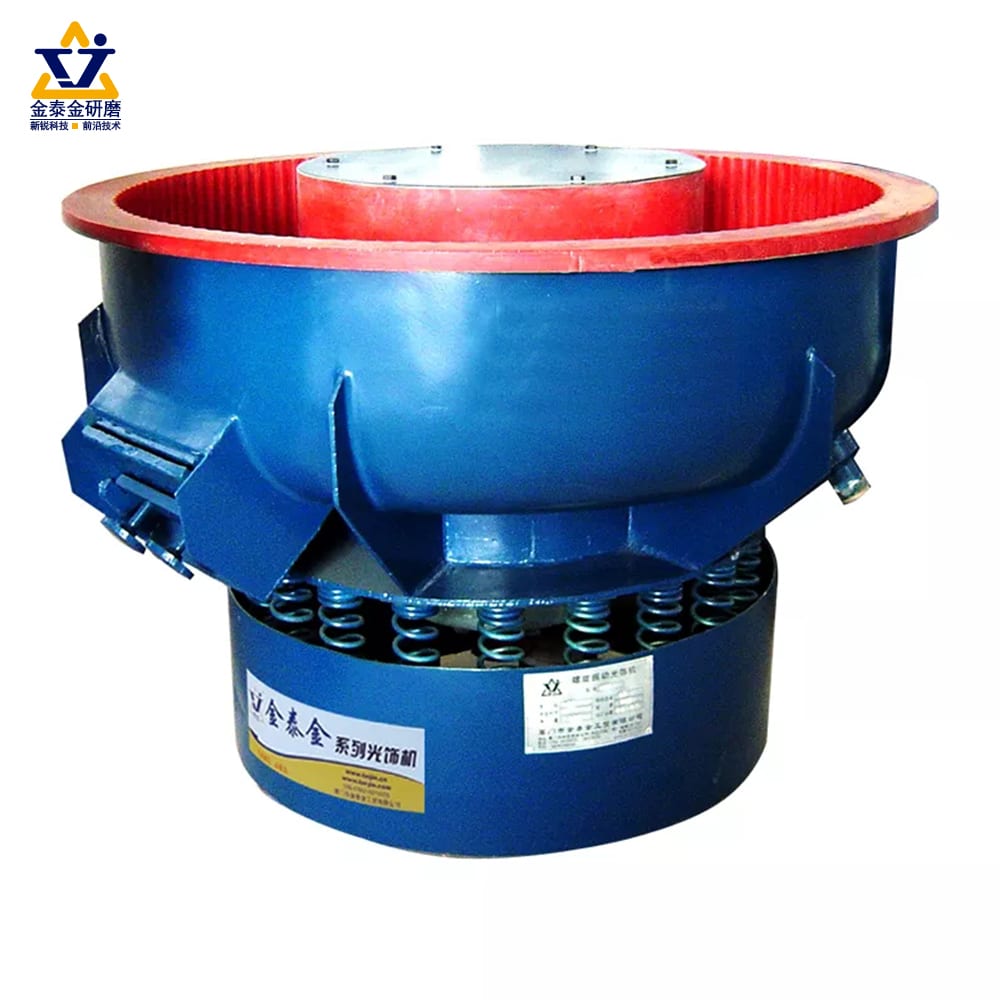
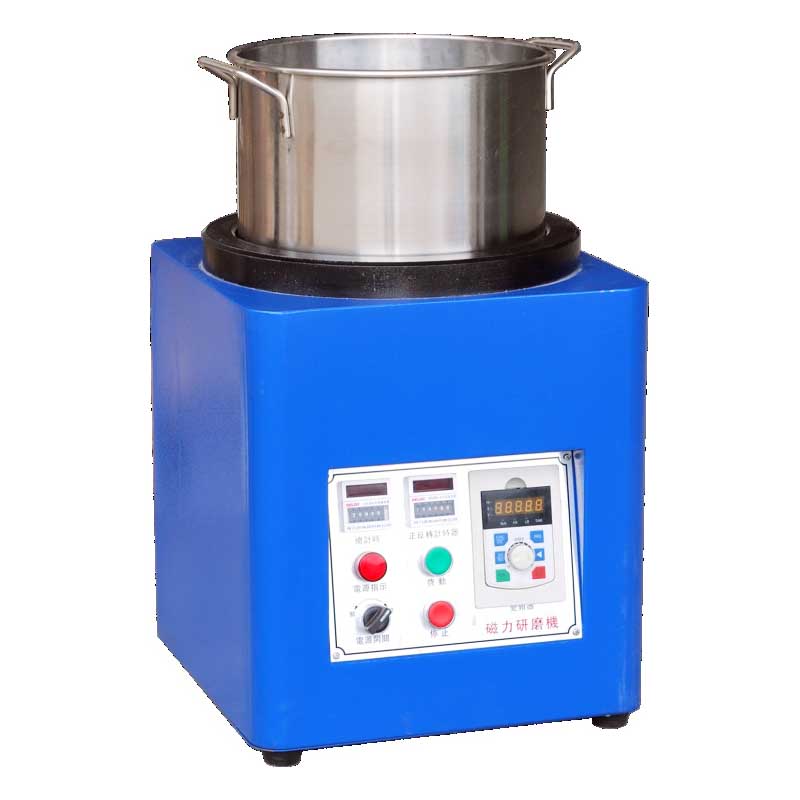
4. Сочетание среды и соединения
| Материал детали | Рекомендуемые медиа | Составной / Ноты |
| PLA / PETG / ABS | Скорлупа грецкого ореха (24–36 фунтов), затем мелко нарезанная кукурузная мука для придания блеска. | Сухой процесс; сначала короткие циклы — термопласты быстро округляются. |
| Смола SLA/DLP | Мелкодисперсные пластичные материалы (треугольник или тетраэдр) | Влажная вибрационная обработка с использованием мягкой смеси; полное отверждение перед галтовкой. |
| SLS / MJF нейлон | Керамические или пластиковые материалы, среднего размера | Разглаживание также улучшает результаты окрашивания; сначала нужно выдуть порошок из отверстий. |
| Металл AM (Ti6Al4V, 316L, AlSi10Mg) | Высокоточная керамика (первая степень зернистости, вторая степень зернистости). | Двухэтапный процесс: удаление заусенцев/шлифовка, затем полировка; проверка изменения размеров. |
5. Пошаговый рабочий процесс
1. Удалите опоры и плот.
Перед началом финишной обработки необходимо срезать или отломать опорные элементы — абразивные материалы не могут эффективно удалять толстые остатки опор.
2. Грубая зачистка.
Проведите интенсивную обработку поверхности, чтобы устранить следы от опор, заусенцы и самые заметные линии слоев.
3. Доработка поверхностей.
Более мелкий абразивный слой сглаживает края и выравнивает поверхность, обеспечивая ровный конечный результат.
4. Польский язык (по желанию).
Для придания блеска деталям с помощью полировального материала или пасты можно использовать сухую кукурузную муку для пластмасс, фарфоровую или стальную — для металлов.
5. Чистый и сухой.
Смойте остатки влажной смеси или обваляйте в сухих кукурузных початках, чтобы удалить пыль и масла.
6. Осмотреть и упаковать.
Перед упаковкой проверьте однородность отделки и критически важные размеры в соответствии со стандартом для первого образца.
6. Распространенные дефекты и способы их устранения
| Дефект | Вероятная причина | Исправить |
| Детали слиплись или наполнитель застрял в отверстиях. | Крупноформатные медиаматериалы; перегруженная чаша | Используйте носители меньшего размера или смешанные размеры; уменьшите коэффициент загрузки — см. наши рекомендации.руководство по повреждениям отдельных деталей |
| Края чрезмерно закруглены, стенки истончены. | Слишком длинный цикл или слишком агрессивные СМИ | Сократите циклы, снизьте качество носителя, проверяйте размеры в каждом испытании. |
| После полировки поверхность становится матовой и тусклой. | Загрязненная среда; неправильная дозировка соединения. | Очистите или замените носитель; дозируйте компаунд небольшими порциями и часто. |
| Порошок, захваченный в каналах SLS | Недостаточная предварительная очистка | Продувка / ультразвуковая предварительная очистка; для глубоких каналов используйте магнитный игольчатый фильтр. |
7. Защита важных элементов во время завершения работы.
Контакт, который сглаживает поверхность, может также повредить тонкие стенки, мелкую резьбу и острые кромки. Поддерживайте достаточно высокое соотношение абразивных материалов к деталям, избегайте смешивания твердых и мягких абразивных материалов, если это не предусмотрено, и всегда проверяйте размеры на контрольной партии с маркировкой. Для приобретения расходных материалов ознакомьтесь с нашим ассортиментом.сухие отделочные материалыикерамические материалыдиапазоны.
Хотите расширить возможности постобработки при 3D-печати?
Пришлите нам ваши отпечатанные образцы и целевые характеристики поверхности. Наша команда проведет пробные финишные обработки и порекомендует оборудование, материал и цикл обработки, а также расскажет о результатах.
Свяжитесь с нашей командой отделочниковОфициальный сайт:www.surface-polish.com | Адрес электронной почты службы поддержки:info@surface-polish.com
 +86-592-2381506


 Поддержка сети IPv6